Listen, backpacking can be hard. There is nothing like working your butt off finally getting to camp, throwing your pack down, and realizing you still have to prep your food, cook it and then clean it all up. It is in these moments we grab for the granola bar, get in your sleeping bag and call it a day.
There was a certain point in our backpacking careers when we looked at each other and thought there had to be an easier way.
And there is!
You will never guess, but people have already capitalized on it. Brands like Mountain House charge 8-15$ per unit on their quick, easy, just add water backpacking meals. As you can imagine, this adds up quickly if you are looking to stay out in the woods for an extended period or do it cheaply.
So we researched and found a different solution.
Freezer Bag meals
You can be as creative as you want and become a back country chef
Here is the basics you need to know
First what we will need:
- Freezer bags (as long as it says freezer bag on the label even the off brands can hold boiling water) we have tested.
- A starch
- Dehydrated Veggies
- Protein
- Seasoning
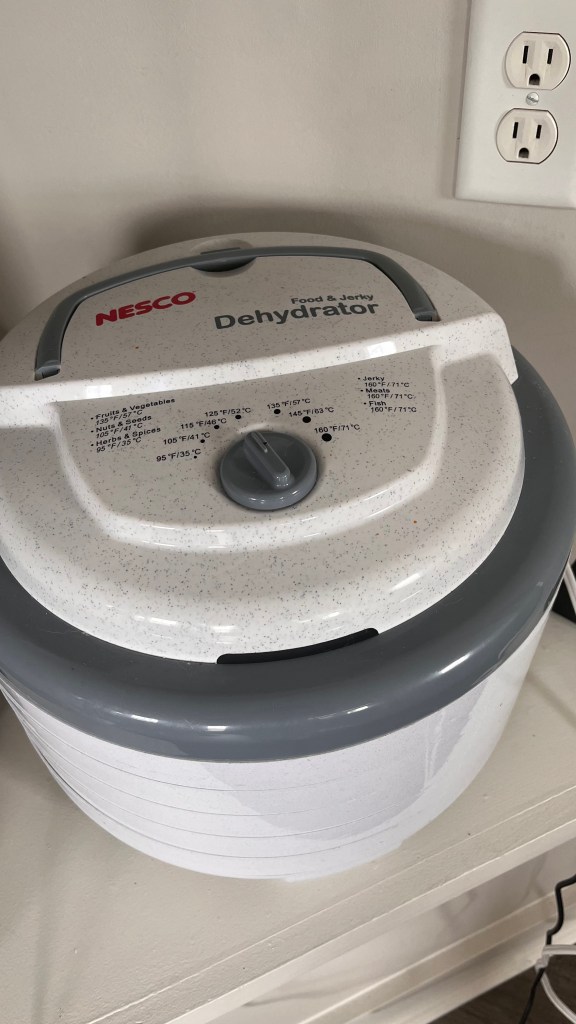
- Dehydrator (optional) possible to create meals without one
So first, we start with starches
Minute-ready rice, roman noodles, or couscous are three types of starches that do not need to be dehydrated beforehand and can go straight into the freezer bag to create the base of your meal.
Noodles need to be cooked beforehand and dehydrated at 135F for 6-12 hours. We have tried not dehydrating them before, and it is edible, but honestly, it not very good.
The dehydrator we use is a “Nesco” brand food & Jerky. It can cost anywhere from 50-100$ on the internet.
The next step is to add veggies (this isn’t necessary, but it is important to be getting your vitamins while out in the backcountry.
Frozen bag veggies are the easiest because, typically, they have already been blanched (briefly immersed in boiling water) and can be thrown right into the dehydrator.
Typically we do 125F for 6-10 hours.
You also can use fresh vegetables. They takes a little bit more prep at times. Such as washing, cutting, and blanching before going into the dehydrator.
There are plenty of resources on the internet for how to dehydrate depending on which veggie you want.
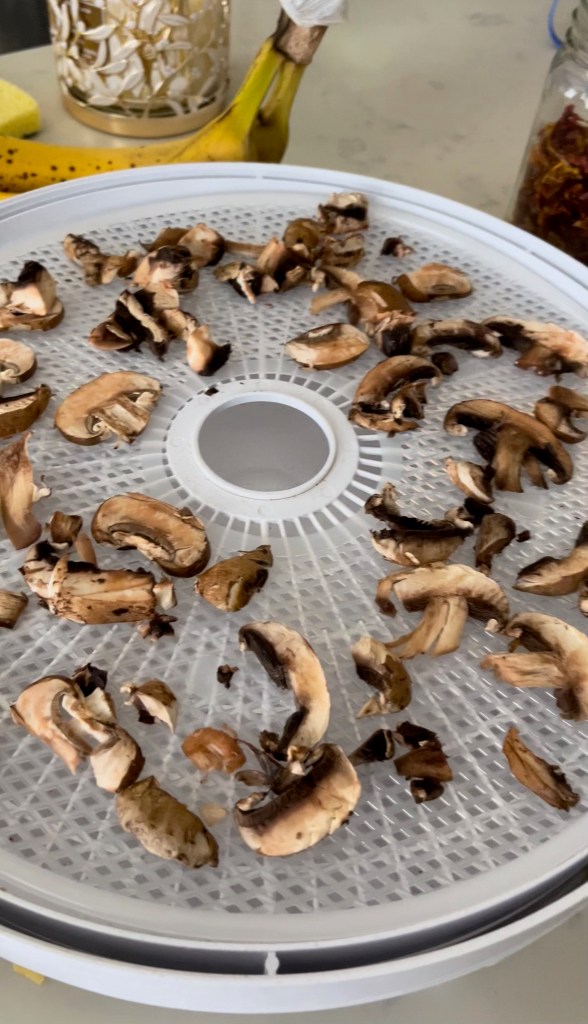
We tend to do mushrooms fresh, as you don’t need the blanching process and it takes 3-8 hours at 125F
The next step we do is protein.
Recently we bought TVP (textured vegetable protein) to try out and use for our next thru-hike backcountry meals we are prepping. We are trying this out because it is cheap, lightweight, and easy. We will let you guys know our thoughts.
We have also dehydrated our own ground beef in the past.
*Note you NEED to use bread crumbs as well, or else it will taste like gravel. Do half a cup per pound.
Here is an awesome resource that we personally use https://www.backpackingchef.com/dehydrating-meat.html
You can also dehydrate chicken (we have not personally done it so I can’t speak to it) and you can also purchase really any of this already hydrated online.
The last step is seasoning.
An easy technique you can do is buy the prepackaged seasoning packages you can get just about anywhere. There is anything from taco seasoning to classic buffalo and everything in-between.
You also can get creative and just throw whatever you want in there.
We personally use a lot of power milk, cheese, and butter in most of the backpacking meals we create.
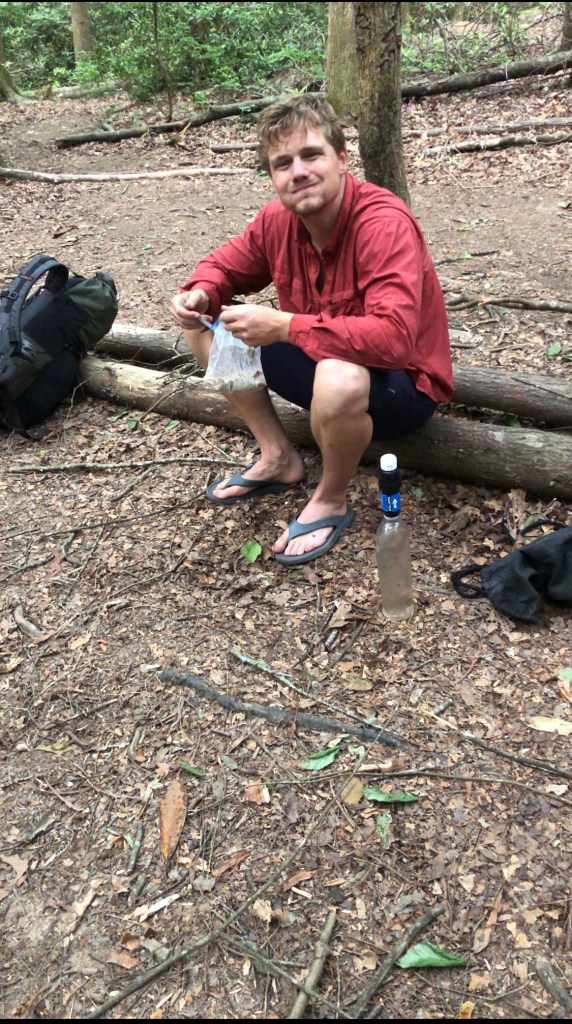
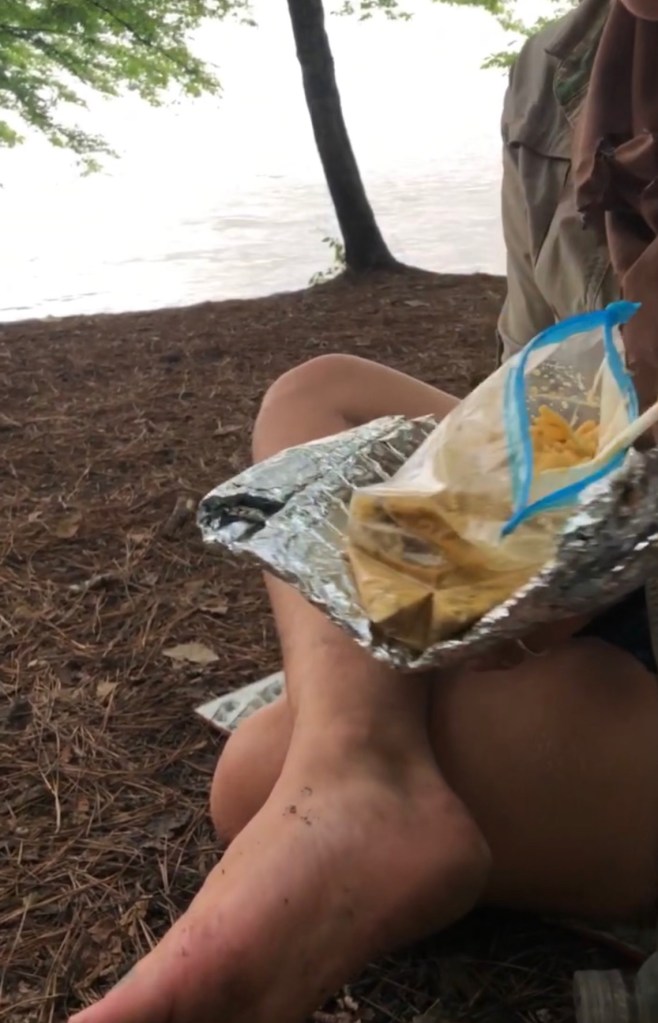
Once you have everything we want in your freezer bag, you are all set! Now when you are out in the backcountry all you have to do in pour boiling water into the bag and your set.
We typically pour enough water that it fills up and goes slightly over the contents of whatever is in the bag.
If we have poured too much into the bag, a technique we have been using is to pour a bit of instant mash potatoes into the bag (soaks up the water and adds extra calories)
Also a way to help the contents cook faster, is to use an insulted pouch to put the freezer bag into.
You can use a reflective material and create your own (we made one from an old car window reflective sunshade) or you can clean out the packaging from a store bought backpacking meal and use it over and over again.
We are working on prepping for our next thru-hike so we can post specific recipes here soon.
Subscribe to our email list to not miss it!
